Pages

Showing posts with label dessert. Show all posts

Friday, July 12, 2013

Apple Crumble- A healthier version for dessert or breakfast.


Today I am getting frugal. I have been meaning to have a grand savings plan for such a long time, but things like a 1974 Volkswagon Type 3 Square back, a new DSLR, overseas holidays and a fancy new fridge come along and demand my cash. Not to mention all the necessary social functions. I am looking at ways to get real. I think it's time to get financially responsible- only in order that I can buy a house. For no other reason. There is a little old church down by the beach that has been newly converted into a house. It's my dream home. It also happens to be the church that my fiancés grandparents were married in. It would be so easy, if only I had saved a deposit instead of having so much fun.

 I have been rummaging through my cupboards, remembering what it was like when I was a student. I always had the ability to make something out of nothing and I've been thinking of cheap alternatives that are just as much fun as extravagant outings. You may have read my previous post on how to live a budget conscious vegan lifestyle. I do follow those general rules and they allow me to have a very comfortable and fulfilled time whilst living my little life.

And so here I am, on this Friday night. We would normally be out, running around the markets and seeing bands. Instead, I am watching movies on the couch in the warmth of my lovely home which is just as lovely. I have made a firm effort to not buy anything this week and in doing so have made do with what is already here in my cupboards.

For dinner, I made Szechwan eggplant with an eggplant, rice and some random sauces and vinegars.
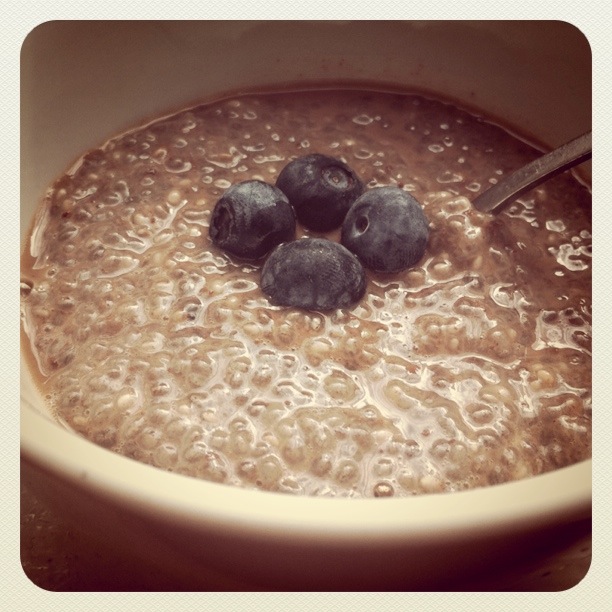
For dessert, I made this simple and tasty little number. I didn't take measurements so you will have to bear with me. I can give you approximations but really, you can throw it  all in. It's highly unlikely that it won't work out.

Time: 30 minutes.
Makes 1. 

Ingredients:

  • One apple, peeled, cored and chopped.
  • Half a cup of porridge mixture or muesli. I used the one that I featured previously. 
  • A tablespoon of coconut oil, melted.
  • A tablespoon of agave, maple syrup or another sweetener of your choice.
Method:

Heat the oven to about 180C/ 350F. Place the apple pieces into a small, oven proof bowl. 
In a separate bowl, add the muesli, coconut oil and half of the sweetener. Mix them together well. It will be a little sticky, but not overly. It won't clump together a whole bunch, but just enough. 
Place the rest of the sweetener on top of the apples. Now, top the apples with the oat mixture and then place aluminium over the bowl.
Place in the oven for about 30 minutes. 

This would also make a great breakfast. The apples could even be swapped with pears or bananas. 

I'm planning on having this for breakfast in the morning. I loved it. I hope this post makes sense. As always, just have a play, but it should be pretty straightforward.

I hope you are having a great weekend. :) x

Friday, December 28, 2012

Raw Banana Ice Cream. A Real Revelation.


I love ice-cream. There are some great brands out there that make delicious, cruelty free ice-cream for our taste buds to devour but there is something amazing in taking it right back to basics and making it yourself. Seriously, this recipe could not be easier, cheaper or healthier for you. I always end up in childlike awe and wonder when I make a banana ice-cream. It's just like the real thing. I can't fault it. You can add so many different flavours to it to make the ice-cream of your dreams. Have a play.

Time: Freeze overnight and then five minutes prep.
Serves: 6

Ingredients:

  • Six bananas.
  • Whatever you wish to flavour it with, like half a teaspoon of vanilla, or one tablespoon of lemon juice or one tablespoon of cacao nibs or one tablespoon of peanut butter. I used cashews in the photo.

Method: 

Chop the bananas and place them on a tray. Put them in the freezer overnight.

The next day, place them in your blender/ food processor with the other ingredients for a few minutes on high until it looks like ice-cream. You can place it in a container and keep it in the freezer.
The banana ice cream keeps for quite a while.
I recommend letting the mixture sit on the bench for a few minutes before serving if you are taking it directly from the freezer as it can be rock solid.

Devour, completely guilt free. 

Thursday, December 27, 2012

A little late, but Easy, Vegan Fruitcake.


You are  a fruitcake.

Just joking! How was your Christmas? Good, I hope.
Me? I finished nightshift at the hospital at 7:30 am had a nap and then awoke to some amazing presents (not that that's what it's all about) from my favourite person in the world. We then scuttled off to Gordy's mum's house for lunch and then my mum's house for dinner. They both went to so much trouble to make me a wonderful meal. So beautiful.
Last week, we went to a Christmas lunch put on by a friend. As I had been working nightshift, I hadn't prepared any food to bring with me. The savoury food was easy when it came to finding something vegan. I had mushrooms and a bean salad. When it came to dessert, I thought I would only be eating the fruit, until my lovely friend told me of the ingredients in the fruitcake that she had made. The cake was tangy and delicious and sounded simple to make.
I went home and googled  the recipe. I looked at quite a few different ones and read all the comments to come up with a recipe that took all of their trials and tribulations into account. It was so delicious. I fed it to my family for dessert on Christmas night and not one person made a comment about it being vegan, as they usually do. They all quite enjoyed their cake. This recipe is probably a little late in timing but it's a good one to remember, none the less. It makes a relatively healthy snack, even if you bake one and cut it up into pieces to freeze for work and school lunches.

Time: Overnight to soak, ten minutes to prepare, 1.5 to 2 hours to cook.
Serves: Many. About 16. 

Ingredients:

  • One kilo (2. 2pounds) of dried fruit.
  •  2 Cups of orange juice. I've seen that some people find this too tangy. If you're not a fan of the tang, maybe try half OJ, half water or half apple juice.
  • 2 Cups of self raising flour.
  • Half a teaspoon of cinnamon.
  • Half a teaspoon of cloves.
  • Half a teaspoon of nutmeg.
  • One Tablespoon of rum (pirate talk, optional).

Method:

Soak the dried fruit in a bowl with the orange juice overnight.
The next day, add the other ingredients to the bowl and give it all a good stir.
Now, you can either make one cake or two. I made two medium sized loaves and took one to work and one to the family dinner. Make sure whatever pan you put them in is either non-stick, well greased or lined with baking paper so the cake doesn't stick.
Place in the oven at 160C/ 320F for an hour. At this time, check that the cake is cooked  by sticking a skewer in the middle of the cake. If it comes out clean, it's ready. If not, place back in the oven and cook for a further 30 mins. Repeat the skewer action. It should be ready if you have made the loaves, but one whole cake may take another 30 minutes.
All ovens are created different. You know your oven better than I do so have a play and see what works for you. The cakes shouldn't need longer than 2 hours.

Serve with custard and enjoy any time of the year. x

Monday, October 8, 2012

Vanilla Cupcakes with Marmalade and Almond Topping.


Last week I was on night shift at work and I made these delightful little cakes to share with my coworkers. They were light and fluffy and went so quickly that I made some more the next night for all those that missed out on the first batch.

Work was fun. I worked with some lovely people and during a quiet moment we went ghost hunting around the spooky corridors of the hospital. We freaked ourselves out. It was hilarious.

Time: Ten minutes prep and 30 minutes to cook.
Serves: 18.

Ingredients:

  • 1.25 cups of vegan butter, like nuttelex.
  • 1.25 cups of raw caster sugar.
  • 1.25 cups of self-raising flour.
  • 2 level teaspoons of baking powder.
  • 4 teaspoons of egg replacer. I used No Egg. Follow the instructions on the box to make it. You may have to mix it with 4 Tablespoons of water.
  • 1 tsp of vanilla.
  • Half a cup of chopped almonds.
  • Half a cup of marmalade. 
Method:

Pre-heat the oven to 175C/ 350F. 

Place all of the ingredients except the marmalade and almonds in a bowl and blend with a  hand blender.

Place 18 patty pans in a muffin tray. Scoop a heaped tablespoon into each one. 

Place the trays in the oven and cook for half an hour or until golden brown. You should be able to stick a skewer in them and have it come out clean. Place the cupcakes on a wire cooling rack. 

Place the marmalade and almonds in a saucepan and bring to the boil. 
Take off the heat and place a little on each cake. Allow to cool. 


Gobble these babies up. 

Wednesday, September 5, 2012

Melting Moments to Melt Your Vegan Heart.


My posts have been few and far between and for that I apologise. Just when you thought I didn't have enough hobbies, what with working, my blogs, curating, the Cake Liberation Front, running life drawing groups, drumming lessons, trying to get in some art and craft time and deejaying, I have gone and picked myself up two more hobbies. Bikram Yoga & Meditation.

The idea behind these two is to help me calm myself and focus, I suppose, as well as get the wonderful health benefits. I often wonder (and have been asked) if I have adult onset ADHD. I just can't seem to sit still. Essentially, I think the reason I am so active is that I know how short and precious life is and I don't want to waste a moment of it.

My high school art teacher had a great influence on me. When I couldn't figure out what I was doing with my life she gave me some essential advice. She said "You don't want to be on your death bed and look back on your life and regret the things you haven't done." I have obviously taken this advice on board to the hilt.

So that there is my excuse for not making many posts. I've got a bunch of photos. I've just gotta get to the write ups.

Here is a special treat for you, though. They are very regular, as in there are no special ingredients and a lot of it is your regular vegan substitution foods. They are Melting Moments.

I took these to the last Cake Liberation Front meeting on Sunday and they were all gobbled up. Very delicious. Just make sure that your sugar and glacé cherries are vegan. Some white sugars use bone char to filter it and the cherries sometimes use bugs called shellac to make them shiny. Avoid the preservative number E20 and there'll be smooth sailing.

Time: 10 Minutes prep. 15 minutes to bake.
Makes 20 or so.

Ingredients:
  • 3/4 Nuttelex or other vegan margarine substitute. 
  • 1/3 Cup of powdered or icing sugar. You can make powdered sugar by placing it in a blender or coffee grinder and blitzing it for a minute or two. I use raw sugar for this. 
  • 1/3 Cup of cornflour.
  • 1 Cup of plain flour.
  • About 10 glace cherries, chopped in half. 

Method:

Place the sugar and butter in a bowl and beat well. Add the cornflour, the flour and vanilla and stir very well. I like to just chuck it all in my food processor and mix in with  a spatula but whatever floats your boat.
Now line your tray with baking paper.
For the next part, you can either place the ingredients in a piping bag to make cute, little patterned biscuits or just use a teaspoon. They do look cute if piped but hey, they still taste the same. Amazing!
Place half a glacé cherry atop each one, so that it is placed in the middle of the biscuit.
Place them in the oven at 180C or 360F for 15 minutes or until they are golden.
Take them out of the oven and let them cool on a wire rack.


This was at the Cake Liberation Front meet. They got a bit bruised and bashed on the way there but they were still delightful. 

Hope you're all fantastic! Welcome to Spring, Southern Hemisphere. 


Saturday, May 12, 2012

Happy Mothers Day- Chai Hot Chocolate Spoons xx


Hey there, lovely people. I will do a wrap up of the Live Below the Line at a later date. Bit busy being crafty and getting ready for work. So much has been going on and I can't wait to tell you about it, alas, I must be quick.

Today, I have made some cute little chai style Hot Chocolate Spoons. I am very excited by the prospect of winter if only for all the tea, soup and hot chocolate I can drink. If you know me much, you know I have a lot of trouble sleeping. Last night at my local grocer, I found a fair trade vegan hot chocolate made with real chocolate beans. I drank that along with some vegan cookies because I felt like a bit of a treat. One hour later, I was fast asleep on the couch. It was like magic.

I often don't enjoy fake chocolate flavours which is why I don't often eat chocolate ice cream or chocolate topping. This is one of the reasons I thought these Hot Chocolate Spoons would be a great idea to make. Decadent, delicious and fun. Super cute, to boot.

Time: Two minutes prep, 30 minutes to set.
Makes: Six.


Ingredients:

  • Half a cup of non-dairy dark chocolate.
  • Half a teaspoon of powdered raw sugar (use a spice mill or a mortar and pestle to make raw sugar into a powder.)
  • A few drops of vanilla. Not too much or it will cause the chocolate to harden.
  • One small pinch of cinnamon.
  • One small pinch of black pepper. 
  • One small pinch of cardamon.
  • Six clean tea spoons.

Method:

Add the vanilla essence, sugar and chocolate into a bowl. Now, you need to melt the chocolate. You can do this one of two ways. You can place the bowl in a microwave and cook at 30 second intervals, stirring after every thirty seconds. This should only take one minute to one and a half minutes. Once a little starts to melt, if you stir the mix you'll see the rest starts to melt too. Be very careful not to overcook or the mix will harden.
If doing this on a stove top, you can use a double boiler or place the bowl in a sauce pan that has some water boiling in it. Ideally, your bowl with the chocolate in it should not touch the bottom and you need to make sure that you don't get any water in the chocolate mix. Be super careful with this method! Stir when you notice the chocolate start to melt.
Take off the heat or out of the microwave and add the cinnamon, cardamon and black pepper. Stir. 
Take your clean spoons and scoop up some of the chocolate mix into each one.
Place on baking paper on top of a tray and let set in the fridge.
Once ready, wrap with ribbons and add a hand written card, telling the intended recipient how much you love them and to dunk it in hot nut milk for about 3 minutes. 
And there you have it. A cute little gift your mum will love. xx

Saturday, April 7, 2012

Raw, all natural Chocolate Brownies! Hells Yeah!


I gave these to my family yesterday for our Easter celebrations on Good Friday. I must say a massive well done and congratulations to my mum, who is up to week 3 of her 30 day vegan challenge. I'm very proud. She said that she's found it really easy and she's learned a lot about her health and the meat industry.
She made a delicious meal with spring rolls and Thai green curry. For dessert we had mochi. Admittedly I am in between night shifts and I fell asleep on the couch but it was delicious.
I made these and some  raw chocolates to give as gifts. Alas, the chocolates were not hard enough to pull out of the moulds. I have to work on that recipe. I might just chuck them in the freezer and see if that hardens them up.
Anyway, these brownies are delicious and super easy to make. I often just use whatever nuts, seeds and dried fruit I have in the cupboard and the chocolate is just superb. It makes you feel a little indulgent even though there is no sugar or artificial crap involved. Yeah! I'll give you a basic recipe but remember that as long as you can make a dough, you can add whatever you want.

Time: 10 minutes to make, overnight to set.
Serves: 16.

Ingredients:

For the base:
  • 2 Cups of walnuts. These are the best nuts to use when making chocolate brownies so try to use at least a cup full of them. They release oils which work super well.
  • 1 Cup of dried apricots.
  • Half a cup of currants.
  • Quarter of a cup of water.
  • Half a teaspoon of nutmeg.
  • Half a cup of raw cocoa.
For the chocolate:
  • Half a cup of melted coconut oil.
  • Quarter of a cup of agave nectar or maple syrup.
  • Half a cup of raw cocoa power.
Method:

For the base, place all of the ingredients into a blender and blend until the ingredients form a dough.

Take a square pan about 25cm x 25 cm (ten x ten inches) and line with baking paper.

Place the dough in the pan and level out using your hands.

Take the ingredients for the chocolate and place them in a bowl. Stir well. You may even want to use a hand blender if you have any lumpy bits.

Take the chocolate mixture and place on top of the base. Smooth using the back of a spoon.

Place in the fridge to set over night.

And that is it! Too easy. You can cut it up and serve it to your loved ones. I often leave a batch in the fridge to put in my lunch box for work.

Happy Easter everyone. Have a safe holiday and please take care on the roads. I don't want to see you at my work.

Oh, and hello to Christina A.'s friend that has been living in Antarctica. :) You (and everyone else in Adelaide) should come to one of our Cake Liberation Front meetings. You can find the details here.

Thursday, March 15, 2012

No Bake (Yes, that means Raw) Apricot Bars.


I love apricots... And macadamias... And I don't really know what else to write about at this particular moment. It's 02:44 in the morning and I have just eaten this Apricot bar. I do like to make a raw treat for my night shift lunches. This helps me avoid the machine that delivers me potato chip goodness in tiny foil packages in exchange for $1.80.

Time: 10 minutes.
Serves: 8.

Ingredients:
  • 1 cup of macadamias.
  • 1 cup of dried apricots.
  • 1 and a half cups of shredded coconut, plus two tablespoons.
  • Two tablespoons of lemon juice.
  • One teaspoon of lemon zest.
  • Two tablespoons of water.
Method:

Place the macadamias and apricots in a food processor and process on high until they become small crumbs.
Add the other ingredients (except the two tablespoons of coconut) and mix until it all clumps together, scrapping the sides as need be.
Take the ingredients from the food processor.
Line a small baking tray or container (I'm talking 10 cm by about 20 cm. I think that is 4 inches by 8 inches) with baking paper.
Place the mixture in the tray on top of the baking paper and press it down into a slice.
Sprinkle a little coconut over the top and pop in the fridge for a minimum of an hour, preferably overnight.
Slice into bars or squares and enjoy.

Friday, March 9, 2012

Cherry Crumble and the Vegan Cooking School!

Talking to yourself with the camera turned on is weird. Just plain weird. And the thing about youtube... so many mean people in the world. Mean people suck. BUT...

This is the debut of the Vegan Cooking School. Some of you adore print. Some of you adore motion. Let me help you out with that. I'll periodically be making recipe blogs to share with you. This is the first of the series- Cherry Crumble. Sexy. Delicious. Easy to make with only four ingredients.


Music by The Bon Scotts, "We can cause such a fuss." www.thebonscotts.com


For those that prefer print:

Time: 1 hour & ten minutes.
Serves: 8.

Ingredients: 
  • One cup of plain flour.
  • Half a cup of vegan sugar (not all sugar is created vegan).
  • One cup of vegan margarine.
  • Two cups of canned, drained cherries.
Method:

In a bowl, mix the flour, sugar and margarine with your hands till it resembles bread crumbs. It should also be able to stick together in little lumps.

In an oven proof bowl, add the cherries. Place the crumble mixture over the top. Place an extra teaspoon of margarine on the very top and place in the oven at 180C or 360F for one hour or until golden brown.
Serve with vegan ice cream or vegan cream.

Prepare for heaven in a bowl. 


Monday, February 27, 2012

Choc Chia (Pet) Pudding or Raw CoCoPops.


It seems my health kicks last from Monday to Thursday an then all bets are off on the weekend. I think it's a mixture of not being prepared for the weekend and having many social engagements. It's fun. I have no complaints. I must admit I had some pretty tasty vegan pizza from Godzilla's on Brighton Road yesterday. It. Was. Good.
Anyway, on with the 'It's Monday and I'm prepared for greatness' show.
Last night I got out my trusty little jar that I have been using to make chia pudding. Chia, in case you've been living under a rock, is a relatively recent superfood that was supposedly used by the Aztecs and provides a lot of protein. Personally, I think every natural and non processed food is a superfood. Fill your body on the good stuff. And seriously, chia? The seed that grew in our Chia Pet's? That's so 80's.
PS This tastes very similar to CoCoPops. Eat this for a super tasty breakfast or dessert.


Makes: 4 serves. 
Time: ten minutes plus overnight.


Ingredients:

• 1/4 Cup of chia seeds.
• One and a half cups of nut milk (I like homemade almond or rice).
• One tablespoon of natural sweetener, such as agave or stevia.
• One tablespoon of cacao powder.

Method:

Place these all in a jar and give them a good stir.
Place the jar in the fridge and in the morning it will be ready to eat.
Should keep for about 3 days.

Saturday, February 11, 2012

Stewed Cinnamon Pears -or breakfast in bed on a lazy Saturday.


Let's get one thing straight. I am not a breakfast person. I think I stopped eating breakfast somewhere around the tender age of ten. I have started in recent years to bring this supposedly important meal back into my day but honestly, first thing in the morning is a little too early to be chowing down on the sweetness that is cereal or the bloat that is toast. I usually like to eat fruit or a muesli bar. Something that you can grab and run with. Even then, I'm glad I work nights so I can have breakfast as the last meal of my day.


This morning I awoke at 5am. This is mainly due to the siren of an alarm clock belonging to the lover with whom I share my bed. Good on ya, Gordy. I'm not being mean. The boy works hard.

I had been laying in bed for about an hour wondering if it's too early to play drums, when the desperate need for a cup of tea took over. I have a long day ahead and there is no chance for an afternoon nap today. Must get stuck into the tea early.

Then my belly began to rumble. I remembered I bought a packet of all natural cereal about a month ago. That in itself is crazy. Best of all, I remembered the stewed cinnamon pears that I had previously made in the fridge. Best.

Ingredients:

  • As many chopped pears as you can fit in your slow cooker. I used about 8-10 medium pears.
  • 2 cups of water.
  • One cinnamon or cassia stick.
  • 3 cloves.
  • Half a teaspoon of ground nutmeg.
  • Half a cup of coarsely chopped almonds.
  • Half a cup of walnuts.
  • Half a cup of chopped dates.
  • 2 Tablespoons of maple syrup.
  • A small pinch of good salt.

Method:

Place all the ingredients in your trusty slow cooker. Cook on high for between 4-8 hours. In other words, check them at the four hour mark and if they don't look as sexy or smooshy as you'd like, cook them for another four.

Keep them in a jar or air tight container in the fridge. They should keep for a couple of weeks.

In the photo, I've served them on top of the cereal and placed some chopped brazil nuts on top. Brazil nuts help regulate blood sugar. I like nuts.

One note on slow cookers. I plug mine into a timer so as not to overcook it if I'm not home to turn it off. I do this for my dehydrator as well. Works a treat.

Also, a note to fill everyone in on my little cook book adventure and the proposed you tube cooking show. It seems someone spilled some sort of liquid on my beloved computer. It's costing between $600- $1000 to fix and I'm not sure that when I get it back my work will still be on it. I'm trying to remain positive. I don't really know how I'm remaining positive but I just remind myself that this is a first world problem and it's not life and death, even if I am minus a grand. Maybe I'll just hit my drums a little harder today.  I also have wine brewing and I realised that I used actual fruit juice instead of fruit juice concentrate and it's probably going  to taste like crap. My attention to detail is lacking at the moment. Focus, Brain. With the bad comes the good. I just gotta remember to see the little miracles in the everyday.

Long live the optimist. xx

Thursday, December 22, 2011

Vegan Rum Balls!


I have put my hand up to make the rum balls at work this year. I always get teased by my so-called friends because even though I've been making what I've been calling rum balls since I was able to use a spoon, my family's recipe is quite deadly. I have since (as in, today) discovered that what I was making was in fact, rum butter. Rum butter is delicious! It's icing sugar, rum and veggie butter mixed together and rolled into balls. We put these on our fruit mince pies and devour. But... anyway.

These rum balls I have made here are the more traditional ones that we are all used to. They are actually freaking delicious. I have them sitting in the fridge now and I can't wait to eat more of them. These rum balls are super easy to make, too. This would be a good one to get the kids involved with. 

Makes: 24
Time: 15 Minutes.

Ingredients:
  • One packet of vegan sweet biscuits.
  • 3 Tablespoons of cocoa.
  • 1 Cup of currants.
  • 1 Teaspoon of vanilla.
  • 2 Teaspoons of rum.
  • 2 Teaspoons of raw sugar.
  • One third of a cup of veggie milk (I used almond milk).
  • A cup of shredded coconut.
Method:

Place the sugar and the milk in a saucepan and bring to the boil, stirring the whole time. As soon as the sugar has dissolved, removed from heat.

Place all of the other ingredients in a blender and blend until the mix is crumbly. Keep blending and  slowly add the milk. If the mix is not dry enough, add some coconut until the mix is dry enough to form into balls. 

Scoop out heaped teaspoons of the mixture and roll in coconut until you have used all the mixture.

Store in the fridge. 

Have a Merry Christmas, guys! :) xx

Tuesday, December 13, 2011

Raw, Vegan Choc Banana Mousse


I have always been a little skeptical of avocado in dessert. Last Friday, I purchased a raw key lime pie and all I could taste was avocado and lime. In my head, this made sweet guacamole. Not the greatest.
In this here dessert, the taste of the avocado is overtaken by the cocoa and the banana. The texture is silky smooth and looks exactly like mousse. In fact, I bet if I gave it to someone without telling them what it is, they wouldn't know the difference. I'm thinking of using it as a pie filling. Delish.

Time: 5 minutes.
Makes 2 Cups.

Ingredients:
  • One really ripe banana.
  • One really ripe avocado.
  • 1 Tablespoon of cocoa/ cacao powder.
  • 1 Tablespoon of agave nectar (optional).
Method:

Place all of the ingredients in a food processor and blend until smooth and creamy. Stop occasionally to scrape down the sides.
Will last for a day if placed in the fridge in a sealed container. The outer layer will change colour to a darker brown, just like normal mousse, but it's still good (It's still good)...

Tuesday, December 6, 2011

Raw Christmas Pudding Flavoured Muesli Bars...


This one is for you, Nina!

The original plan was to make apple and cinnamon muesli bars. I had no apples and no cinnamon and I am trying my hardest to save money for a deposit to buy a house. The "saving money" part is the hardest thing in my life. I don't know where it goes. I spend hardly any money on groceries. I stopped driving my car. Where do you go, dear pennies? Well, anyway. Back to the story. What I do have in my cupboard is dried currants and nutmeg. Mmm... These muesli bars are so sweet and when i closed my eyes, remind me of the richness of a Christmas Pudding. Get in the spirit people! You know me. Any excuse to celebrate.

Time: 10 Minutes prep plus 20 Minutes cooking time.
Makes 16.


Ingredients:

  • 1 Cup of dried Sultanas.
  • 1 Cup of dried Currants.
  • 1 teaspoon of ground nutmeg.
  • 1 Cup of Oats.
  • Half a cup of sunflower seeds.
  • 1 teaspoon of vanilla essence.
  • Half a cup of coconut.
  • 2 Tablespoons of light veggie oil, such as canola.
Method:

Place all of the ingredients in a food processor and blend on high, pushing the sides down regularly. You want it to become sticky and be able to form into bars without falling apart. 
Once this is done, line a baking tray with non stick paper. Scoop out enough mixture to form into a bar, about 2.5 cm/ 1 inch wide by about 7.5/ 3 inches long. It can be about 2.5 cm/ 1 inch thick, too. 
Place the bars on the tray and bake at 200C/ 400F for about 20 minutes.
Leave to cool on a wire rack and store in the fridge. They should last for about a week. 

Monday, November 14, 2011

Vegan Gingerbread Moustache Cookies xx


Movember is a fantastic time of year. Not only do all the men in town get to grow and sport the coolest moustaches, they are also raising awareness  of men's health issues, especially prostate cancer and depression. Men a renowned for not seeking medical attention until it is too late and this is so sad and unnecessary. Asking for help proves that you are a genuine human being and I have no idea  why anyone would give that a negative connotation.

To help others, you have to help yourself first.

So in a fit of jealousy for my lack of ability to grow facial hair (ok, kinda. Not really) and to show my support, I bought these cute moustache cutters online and made these gingerbread moustaches.

Makes: Many! It depends on how big your cutters are. I actually cut the mixture in half, wrapped one half in glad wrap and put it in the freezer.
Time: 10 minutes prep, 15 minutes to cook, 1 hour to rest.


Ingredients:

  • 3 Cups of plain flour.
  • 1 Cup of veggie margarine.
  • 1/2 Cup of cocoa.
  • Half a cup of veggie milk (I used rice milk).
  • 1 Tablespoon powdered ginger.
  • 1 and1/4 cup of brown sugar.
  • 1/2 teaspoon of salt.
Method:

Mix all ingredients really well. You can either use a food processor or a wooden spoon to do this. It will turn into a  dough. Kneed the mixture for a couple of minutes. Place in cling wrap and put in the fridge to rest for an hour. Take out of the fridge and place of a floured bench.
Using a rolling pin covered in flour, roll the mixture out until it's about 7 mm thick/ 1/4 of an inch thick. 
Cut the mixture out with your cutters and place on a baking sheet.
Place in the oven at 180C/ 350F for 15 minutes or until the sides appear firm to touch. The middle will still be soft.
Take out of the oven and place on a wire rack to cool.

Enjoy! xx

Saturday, November 5, 2011

Vegan Passionfruit Shortbread Kisses xx


These little morsels of bliss melt in your mouth. Who doesn't love and adore the beauty of passionfruit? These biscuits are so cute as well you'll have to share them with others so they can tell you what a great cook you are. You could even give them away as gifts, they are just that cute. And seriously, they are not at all difficult to make. Pretty easy really. Especially if you own a food processor. I heart my food processor.

Time: 10 minutes prep, 15 minutes to cook.
Makes 12.


Ingredients:
  • Half a cup of plain flour.
  • Half a cup of self raising flour. 
  • 2 Tablespoons of corn flour.
  • Half a cup of veggie butter.
  • 2 Tablespoons of brown sugar.
  • One teaspoon of ground ginger. 
Filling:
  • One cup of icing sugar.
  • One tablespoon of passionfruit pulp.
  • Two teaspoons of veggie butter. 

Method:

Place all of the ingredients in a food processor and pulse until the mixture becomes a dough. Alternatively, place all the ingredients in a bowl and mix really, really well. You may need to knead it with your hands. 

When combined, get out your oven tray and place a baking sheet on the top. Take the mixture, one teaspoon full at at time and roll them into a ball. Place the balls on the baking tray and then flatten with a fork. Do this over and over until there is no dough left.


Place in an oven at 180C or 375F for fifteen minutes. Take out of the oven and place on a wire rack to cool completely.

Now, the icing. Place all of the ingredients in a small bowl and stir with a fork until well combined. 

Place one teaspoon of the mixture on the flat side of a biscuit and then place another biscuit on the icing to make a bit of a biscuit sandwich. Do this for all of the biscuits. 

Now, Lick the bowl. xx 


Thursday, November 3, 2011

Vegan Orange and Poppy Seed Muffins xx


Hello November! Or as some like to call it, Movember. In honour of my hairy male cam padres, I have procured some very special cookie cutters which I will share with you later in the month. 

For now, I would like to share these bad boys. I took them to work last night and was told things like "You should start your own bakery." I would. If that didn't entail getting up at 2 am. I'm not an early riser at the best of times and honesty, even though I adore the bounty of baked goods these fine people have to offer and believe that they are extremely talented individuals- Bakers, nothing personal, but you are nuts. I'm guessing it's one of those professions where you have to really love your job for all the hard work and crazy hours you do. That's kinda how many people think about my job, but hey. That's another story. 

Back to the whole "you should start your own bakery thing" before my night shift brain left me wantonly sidetracked. That is testament to how good these little fellas are. I had none of the usual "oh.... they're vegan?" lines. Just plain "These are delicious". A definite winner with the omnivores. 

Enough rambling. On with the show.

Time: 10 minutes prep. 25 minutes baking. (Yep, that's 25 minutes of blissful nothing or fantastic multitasking up your sleeve.)
Makes: Lucky 16.

Ingredients:
  • 2 Cups of plain flour.
  • Three quarters of a cup of raw sugar. 
  • 1 Tablespoon of baking soda. (this did say 4 teaspoons, but just to be sure!)
  • One third of a cup of apple sauce (this will be in the sauce section of your supermarket).
  • Three quarters of a cup of veggie milk (I used rice milk).
  • One third of a cup of light oil (I used canola).
  • Two teaspoons of orange essence (in the baking section, near the vanilla essence).
  • One Tablespoon of poppy seeds (in the herb section). 

Method:

Place all of the ingredients in a large bowl. Using a hand blender, mix them all together until the ingredients are smooth and creamy. It will thicken like a normal cake batter should. 

If you don't have a hand blender, just stir really well and try to get as many lumps out as you can. You may want to add the ingredients bit by bit.

Grease a muffin tray and add about a tablespoon of batter to each one, or half fill each hole. 

Place in an oven at 180C or 375F for about 25 minutes or until the cakes have browned and you can poke a skewer in them and have it come out looking clean. 

Place on a cake rack to cool completely. 

The icing goes a little something like this:

Ingredients:
  • 2 Cups of icing sugar.
  • 1 Tablespoon orange essence. 
  • 1 Tablespoon of veggie butter, such as nuttelex.
Method:

Mix in a small bowl with a fork until the ingredients have come together and are looking creamy and you can create peaks with the mixture. Place about a tablespoon onto each muffin and top with poppy seeds. 

Alternatively, you can pop a very small/ thin slice of orange onto each muffin before cooking and they will come out looking fab. 


Friday, October 28, 2011

Turkish Delight Cupcakes... Vegan Mofo Day 28...


Vegan Mofo is almost over! How sad.
I made these cupcakes last night and took them to the Cranker for Annie's Birthday. Might I just say they are entirely delicious and quite a success. Beware of the monster sugar rush.


Makes: 12
Time: Forty Minutes. 


Ingredients:

  • 2 Cups of flour.
  • Three quarters of a cup of raw sugar.
  • 3 teaspoons of baking soda.
  • One third of a cup of apple sauce.
  • Half a cup of veggie milk (I used rice milk).
  • One third of a cup of light oil (I used canola).
  • Half a teaspoon of vanilla essence.
  • Half a cup of cocoa.
  • 2 Tablespoons of rose water.
Method:

Mix all of the ingredients is a bowl, preferably with a hand blender so that it's all lovely with no lumps. 
Pour into a greased muffin container or 12 patty pans.
Bake in an oven at 180C or 375F for about 20 minutes or until the cakes are springy to touch and you can poke a skewer in them and they will come out clean.
Place on a cake rack to cool completely before topping with icing.

The Most Important Part: Icing.

Ingredients:
  • 2 Cups of icing sugar.
  • 2 Tablespoons of rose water.
  • 1 Tablespoon of veggie butter, such as nuttelex.
Method: 

Mix in a bowl with a fork until the ingredients have come together and are stiff.
Place about a tablespoon full onto each cake and top with something pretty. 

Monday, October 24, 2011

Ridiculously Moist Vegan Carrot Cupcakes... Vegan MoFo day 24 xx


We had the first meet of the Adelaide chapter of the Cake Liberation Front yesterday in the Adelaide Botanic Gardens. Who knew that there were so many rotundas in that beautiful space?
We eventually all found each other and the food on offer was divine: peanut butter cookies, chocolate stuffed dates and I made Carrot Cupcakes. Yes. I took the advice of many of the lovely people who 'like' the Vegan Kitten Facebook page. It seems carrot cake is always the winner, hands down.

How fitting that the first meet was during the Vegan Month of Food (Vegan MoFo). I can't believe it's almost over.

I was so glad to see that there were both vegans and non vegans at the meet as I'm a firm believer that the best way to make new friends is to offer them cake. Hell, the way to my heart is through my stomach. 

I must admit, as someone that doesn't eat much sugar, I ended up on a massive sugar high, which could be the reason as to why I am writing this at 3:35 am. All good though. Back to night shift tomorrow night.

If you're living in little old Adelaide, come to the next one. You can join the Facebook group here.

This recipe is the first one that I have made using apple sauce. To be honest, I was kinda not sure if the cupcakes would work because I was making the recipe up as I went along but trust me, they're perfect. Apple sauce is a winner.

Time: 10 Minutes Prep, 35 Minutes or so to Cook.
Makes: 18 (Yeah!) You can freeze any excesses without the topping and they should keep for a fair while.


Ingredients:

  • 1 Cup of Raw Sugar. 
  • 1 Cup of a light oil, such as canola or sunflower.
  • 1/3 of a cup of apple sauce. Surprisingly they sell this at my local IGA. (That's Independent Grocers Association for those of you that aren't in the know- Shop Local!) I assume that they sell this at other supermarkets or you could of course, make your own. Just simmer some pealed apple chunks with a little water until its all smooshy.
  • 1 Tablespoon of baking soda.
  • One teaspoon of nutmeg.
  • 2 Cups of plain flour.
  • Half a cup of walnuts.
  • 2 cups of shredded/ grated carrot (about 2 large carrots.)
Method:

Add the sugar, oil and apple sauce to a large bowl and blend really well. Preferably use a hand blender to make it all thick. You'll see what I mean.
Add the baking soda and nutmeg and blend a little more. Stir in the flour, walnuts and carrot.  The mixture will get really thick. 
Grease a muffin tray or use cupcake pans.
Spoon the mixture into the tray or pans so that it fills about half of the tray/ pan. 
Add to a preheated oven at 180C or 360F for about 35 minutes.
Keep an eye on them though, as all ovens are different. You want them to be lightly browned, springy when you touch them and when you insert a skewer into one, you want it to come out clean.
Let cool on a wire rack.
Top with lemon flavoured butter icing and half a walnut.

Lemon Butter Icing

Ingredients:
  • 1 cup of organic icing sugar (Non-organic types may have been filtered with bone char. Check before you buy.)
  • One Tablespoon of veggie margarine, such as Nuttelex.
  • One Tablespoon of lemon juice.
Method:

Put the icing sugar in a bowl with the butter and mix. Add the lemon juice a little at a time until it is all mixed in and the icing is stiff. You may need more or less lemon juice. 
Icing is one of those funny things where if you add too much liquid, you have to start again. 
Top the cupcakes with the icing. Lush.

Here are some photos from the meet: 


Monday, September 12, 2011

Super Moist, Vegan Chocolate Cake.

Yes. They are giant strawberries.

Today is my Mum's birthday and she sometimes suffers from hypoglycemia. This means that her blood sugars sometimes drop too low for her body to function. In order to avoid this, she needs to eat a low GI diet. Eating a lot of sugar gives us a sugar high, which in turn causes sugar lows. What goes up, must come down. If we avoid high sugar foods, we maintain a good and stable blood sugar level.
I made this cake tonight to celebrate her birthday. It's dense and moist and delicious. Plus, you can't tell that its vegan or sugar free. It's a bloody good cake, my friend.

Time: Ten minutes prep, forty minutes to cook.
Serves: 8

Ingredients:
  • Two cups of plain flour.
  • Four teaspoons of baking soda.
  • Quarter of a cup of oil.
  • Half a cup of agave nectar.  You could use rice syrup or golden syrup but these are higher in glucose. Still lower than actual sugar though.
  • One teaspoon of vanilla essence.
  • One and a half cups of coconut cream.
  • Half a cup of cocoa powder.
Method:

In a bowl, mix all the ingredients together. If you have an electric mixer, I would recommend using that to make the cake batter nice and smooth.
Take a cake tray and either spray it with oil or smear a little butter over the whole thing so that the cake doesn't stick to it when cooked. Place the batter in the cake tin.
Place the cake into an oven that has been heated to 180C or 360F.
Cook for forty minutes or until you can poke a skewer in the middle and it comes out clean.
Allow to cool on a cake rack before frosting. I covered mine in solid coconut cream, shredded coconut and fresh strawberries. The cake was still a little warm, and the cream kinda melted... whoops.