Pages

Showing posts with label recipe. Show all posts

Thursday, August 29, 2013

An easy vegan alternative to margarine.


I try to eat healthy. One thing that is essential, though, is vegan margarine on my bread. When I read all the numbers on the side of the package I get a little worried as to what all this is doing to my poor, little body. I know that margarines are often bleached to make them that yellow colour that we are so familiar with, so it's time for a change.

That's what makes this alternative so great. It only has one ingredient. It tastes great on a sandwich and even though it's obviously still a fat, it's not the kind of artery clogging fat that will eventually kill you.

Time: 5 seconds and then overnight to set.
Serves: Many.

Ingredients:
  • Olive oil.
Method:

Pour the olive oil into a clean jar. Place the lid on the jar and then put it in the freezer. Freeze overnight. The next day, the oil will be solid. If your freezer is anything like mine, it will be too solid to spread. Transfer the margarine to the fridge and in a couple of hours, it should be entirely spreadable as in the pictures. Keep the spread in the fridge until you've used it all up. 


Friday, July 12, 2013

Apple Crumble- A healthier version for dessert or breakfast.


Today I am getting frugal. I have been meaning to have a grand savings plan for such a long time, but things like a 1974 Volkswagon Type 3 Square back, a new DSLR, overseas holidays and a fancy new fridge come along and demand my cash. Not to mention all the necessary social functions. I am looking at ways to get real. I think it's time to get financially responsible- only in order that I can buy a house. For no other reason. There is a little old church down by the beach that has been newly converted into a house. It's my dream home. It also happens to be the church that my fiancés grandparents were married in. It would be so easy, if only I had saved a deposit instead of having so much fun.

 I have been rummaging through my cupboards, remembering what it was like when I was a student. I always had the ability to make something out of nothing and I've been thinking of cheap alternatives that are just as much fun as extravagant outings. You may have read my previous post on how to live a budget conscious vegan lifestyle. I do follow those general rules and they allow me to have a very comfortable and fulfilled time whilst living my little life.

And so here I am, on this Friday night. We would normally be out, running around the markets and seeing bands. Instead, I am watching movies on the couch in the warmth of my lovely home which is just as lovely. I have made a firm effort to not buy anything this week and in doing so have made do with what is already here in my cupboards.

For dinner, I made Szechwan eggplant with an eggplant, rice and some random sauces and vinegars.
For dessert, I made this simple and tasty little number. I didn't take measurements so you will have to bear with me. I can give you approximations but really, you can throw it  all in. It's highly unlikely that it won't work out.

Time: 30 minutes.
Makes 1. 

Ingredients:

  • One apple, peeled, cored and chopped.
  • Half a cup of porridge mixture or muesli. I used the one that I featured previously. 
  • A tablespoon of coconut oil, melted.
  • A tablespoon of agave, maple syrup or another sweetener of your choice.
Method:

Heat the oven to about 180C/ 350F. Place the apple pieces into a small, oven proof bowl. 
In a separate bowl, add the muesli, coconut oil and half of the sweetener. Mix them together well. It will be a little sticky, but not overly. It won't clump together a whole bunch, but just enough. 
Place the rest of the sweetener on top of the apples. Now, top the apples with the oat mixture and then place aluminium over the bowl.
Place in the oven for about 30 minutes. 

This would also make a great breakfast. The apples could even be swapped with pears or bananas. 

I'm planning on having this for breakfast in the morning. I loved it. I hope this post makes sense. As always, just have a play, but it should be pretty straightforward.

I hope you are having a great weekend. :) x

Thursday, July 11, 2013

Mint and Coconut Toothpaste on the cheap.


I have been buying a few different types of toothpastes over the years because well, as we all do, I brush my teeth. A clean mouth is imperative to be rid of that 'not so fresh feeling' and of course, maintaining oral hygiene.

One part of purchasing toothpaste that I don't enjoy is the packaging that encases the paste. It seems like such as waste. I'm not a big fan of packaging in the first place and so the less I can contribute to the landfill problem, the better.

This recipe is so simple and so cheap. There are just three key ingredients. Coconut oil is antimicrobial, anti fungal and antibacterial. Bicarb soda is a slight abrasive and acts as a remover of plaque. The mint oil leaves your mouth feeling fresh. You also get the chance to recycle old jars and make them as pretty as you like. I love any chance to put delicious and unique experiences in jars.

In a jar, this mix will last a fair while, however, the texture of the mixture will change with the weather as the coconut oil softens in the heat and hardens in the cold. Right now, my mix is rock hard as it's the middle of winter here. That doesn't matter much as I just rub my toothbrush up against the mix. You really don't need much to get a good clean for your teeth.

Plus the whole jar cost me less than two dollars and will last for a very long time.

Time: Ten minutes.
Makes: A cup full.

Ingredients:

  • One cup of bicarb soda (aluminium free).
  • 6 Tablespoons of coconut oil. 
  • A few drops of peppermint oil.
Method:

Place all the ingredients into a bowl. Mix well. Place in a clean jar.

To use, dip or rub your toothbrush into the mix. You shouldn't need much, as I said. Feel free to add more or less peppermint as you so desire. You may also wish to play with the amount of coconut oil you use, depending on what the weather is like in your area.  Happy teeth brushing!


Monday, July 8, 2013

Kombucha Love.


I remember in the mid nighties my mother and grandmother got into this new fad that was going to help them loose weight. It involved fermenting tea with the aid of a giant mushroom in a big porcelain pot. Needless to say, the fad didn't last long. Not many fads did in the nineties.

Kombucha is making a big pro-biotic comeback, in the same way that other nineties fads, like floral prints, ripped jeans, facial hair for the boys and porkpie hats, have.

My family members called this tea "mushroom tea" which doesn't have the nicest ring to it. Kombucha is apparently based on a Russian word and the tea is quite popular over there. I haven't been to Russia personally, so I can't really tell you too much about that. I have read that a previous Russian head honcho put in a lot of time and money to try and discover a magical elixir that would give him more energy and stamina and make him super healthy. He decided kombucha was the way of the future.

Long story short, no one really knows about this tea, the origins or what really is in it. But like everything in this world, no one will do the research into finding these things out unless there is a tonne of money to be made. I sincerely doubt that any scientist will put down his or her pay check to find these things out. What I can tell you is that like any other fermented product (other than alcohol), it is full of probiotics, makes my tummy feel good and tastes great.

Plus, it's tea. Obviously it's rad.

Time: One week to 30 days.
Makes: 1 litre or so.

Ingredients:


  • First of all you need what is known as a SCOBY. That stands for Symbiotic Colony of Bacteria and Yeast. I bought mine from eBay. If you have a friend that  brews kombucha, you can get one from them. This is your mushroom starter.
  • You also need about half a cup of the tea that the starter SCOBY came from.
  • About two black tea bags. I have also used green and that worked a treat.
  • Half a cup of sugar. I am a bit anti-white sugar. It's just ingrained in me not to use it. I have used coconut sugar and raw sugar for this recipe and have been quite successful. Everything I have read says that white sugar is the way to go. I use about half a cup of sugar per litre of tea. White sugar is sometimes filtered with animal bones. 
  • One litre (4 cups) boiling water. 
  • One big glass jar that holds at least a litre and a half of fluid. 


Method:

Boil the water and add the teabags and the sugar. Stir until the sugar dissolves. The whole idea is that the SCOBY will eat the sugar and ferment the tea.

Allow this tea mix to cool completely.

Add the mix to the glass jar along with the SCOBY and starter culture. Leave in a cupboard covered with a clean cloth for about a week. After a week, you will see a baby SCOBY has grown on the top of the tea. You can give this one to a friend or use it to make more mixes. 

You can bottle the brew after a week when it will be quite sweet and still have some sugar in it. Alternatively, you can wait up to a month when it will be more vinegary.

When bottling, you can add fruits, ginger or a herbal/ fruit tea to the mix. Place the bottles in the cupboard again for a week for a second fermentation. This part will make it a little bubbly. 

In the photo above, I have used green tea as the base, and added pomegranate tea on the top. It's delicious.


This is my lunch today. I'm getting ready for night shift and have cleaned the house and made a french onion-style cashew dip. French onion dip was my favourite as a kid. I love the way flavours and smells can bring back such vivid memories. This one is very similar to this dill dressing, but with truffle oil, half an onion and a clove of garlic instead of dill.  x   


Sunday, June 2, 2013

Raw Creamy Dill Dressing.


Oh, wow. I have so much to tell you. I've been on a little journey of self discovery (Yeah. I know. Another one) but this time my mind ticked over my own fear of flying. I became afraid of flying about six years ago, post having a panic attack on an airplane. I'm not really sure what sparked it. A mix of being somewhat hungover, in a cramped space and in a bad relationship at the time, I dare say. Since then, every time I have gotten on a plane, the thoughts that have flown through my head become more and more imaginative. I'm not even going to describe the horrors I see. They're just too graphic.

I have spent the last week in Bali, and I'll go into that in more detail another time. The weeks leading up to the flight had me imagining all kinds of certain death.

At one point I came to terms with the fact that getting on the flight would be the end for me. It's so ridiculous. I started to look for ways to help me overcome my imagination. I started listening to self-hypnosis tapes. I did guided meditation and reiki with a dear friend of mine. I did visualisation and deep breathing exercises. It was at this point that I started to completely realise something which I knew but hadn't fully thought out- Descartes theory of dualism is a crock.

The mind, spirit and body are not separate. Every cell in our bodies is amazing and we don't have to separate them into something bigger than we are to know just how special being alive is. How you treat your body has a profound effect on your mind/ spirit and vice versa. In order to feel entirely good, healthy and in control, we must treat ourselves well in every aspect of our lives. Our bodies were made to move. It feels good not only physically, but mentally, too. Deep breathing helps to calm the cyclone of thoughts in our mind. Challenging our minds helps us to stay lucid and have physical balance. Our hearts well with emotions when wrapping our arms around those we love.

Every little cell in your body deserves nourishment- from your mind, to your heart, to your lungs, to your muscles. Feed it. There is nothing supernatural about it because every single little part of us, and the world and the universe is entirely natural. Astounding and natural. Feel special. You are.

Be whole.

We are all made of stars.

Raw creamy Dill dressing.

Time: 10 minutes.
Makes: Half a cup.

Ingredients:

•Half a cup of cashews.
•One lemon, skin and seeds removed.
•About a Tablespoon of chopped fresh dill, or to taste.
•About a quarter of a cup of water. More or less depending on how you like your sauce.
•Salt and pepper, to taste.

I didn't, but I imagine you could add a clove of chopped garlic to this, if you're a garlic fiend.

Method:

Place the cashews and lemon in a food processor and grind for about a minute. I use a mini food processor which makes small batches of foods easy. It was $15 at Target.
Add the rest of the ingredients and process for another full minute.

Enjoy with salads or on a baked potato.

Sunday, May 19, 2013

Raw Peanut Butter Squares x

I eat a lot. I eat all day everyday. I am constantly snacking. Eating is amazing. I have realised the wobble of my thighs has nothing to do with world peace. I am content.

Tonight I was hungry and I really felt like something peanutty and chocolate like. I kinda made the mixture up as I went along, so feel free to add things to the mix. As long as it sticks together when pressed, it will work perfectly. Sorry about the lame photo. It's a bit shizz. I wasn't planning on posting this recipe, initially, but it's just too good not to share.

Time: 15 minutes. Then about half an hour in the freezer.
Serves: About 24.

Ingredients:

The filling-

• 400 grams of raw peanuts (sorry- I'm not sure how many cups that is. Maybe three?)
• Half a cup of apricots.
• 4 dates.
• One third of a cup of raisins.
• 2 Tablespoons of coconut oil. (You could probably use natural peanut butter here. I couldn't find mine or I would have).
• Two tablespoons of sweetener (I used maple syrup and rice syrup).
• One teaspoon of vanilla essence.

The topping-

• 3 quarters of a cup of cacao.
• Half a cup of maple syrup or agave.
• One third of a cup of coconut oil, melted.
• A small handful of cacao nibs.
• A pinch of salt.

Method:

Place the ingredients for the filling in a food processor and blend on high for about five minutes, depending on your blender. You want to end up with something resembling almost a dough. Press into a tin lined with baking paper.

Put the ingredients for the topping (except the cacao nibs) into a bowl and stir well to combine. Pour over the filling and smooth out. Sprinkle the cacao nibs over the top.

If you're in a hurry to eat this, place in the freezer for about half an hour. Otherwise, keep in the fridge.

Cut into squares and serve with a nice cup of tea. X

Monday, May 6, 2013

Fulfilment and DIY Cinnamon Porridge.


How do you define success? I have been thinking about this a lot lately. I am working in a job that I feel completely blessed to have, but it's not where my heart lies. I find my passion lies in helping people to help themselves and although my job is wonderful, it just doesn't feel quite right. I miss seeing those "lightbulb moments" in people.

Many people don't have the luxury to think about their jobs this way. For many, a job is simply a means to an end. Why live your life doing something you don't enjoy? I've always found that when I want something in life, I figure out what I need to make that happen, and although it doesn't always happen straight away, it does happen eventually. I couldn't possibly comprehend spending the next 35 years working in a job that does nothing for me emotionally. Every day is a blessing and I want to put myself in a position where I can learn and give in way that makes my heart fill full instead of being stressed and dreading rolling out of bed. Moral of the story? Life is short. Do what you love.

The hard part is figuring out what it is I love the most.

 Before you go quitting your job, apply for those jobs you are interested in (and I stress, prior to quitting your current one) or take up studies as you work. It's a hard slog, but if you love it, it's worth it in the end.

I find myself pondering what "success" means. I mean, as long as there is food in my belly, clothes on my back, a roof over my head and the love of my friends and family, isn't that all I need? Money has never really meant much to me. I don't have a desire to have tonnes of it, so if I'm not chasing the dollar, what in turn can make me successful? Is it even a word that should be in our modern day vocabulary? I think perhaps "content" is a word better used in a day to day context.

What is it that makes us crave fulfilment?

And now something to create fulfilment in your belly. Porridge.

Do you remember that advert in the late 80's and through the 90's with the little scottish kid giving porridge a cute little mouthful? He was always telling people "That's not how you make porridge" until he finally got to a spoonful of microwaved, pre-paked oats. It was cute.

I was sent a packet of porridge from lovely Caroline over at Tea and Sympatico. As we are getting into the cooler months here in Australia, I was inspired by the nutty, simple deliciousness of it.
I grabbed some oats and make a mix to keep in my cupboard so I can grab it at anytime and have a healthy and delicious meal.

I've never been a big one for breakfast, but I am really making an effort. I've been making my own yogurt lately thanks to the help of a wonderful reader, Nina. More on that to come once I have perfected the coconut yogurt. So far, I have made soy and I currently have almond brewing at the moment. Autumn is looking wonderful.

Time: 10 minutes.
Makes: About 10 serves.

Ingredients:

  • 4 Cups of oats. I used biodynamic oats. They have not been heat treated and so, when heated, they don't get as gluggy as porridge often does. Please feel free to use whatever you can find or afford. 
  • 1 Tablespoon of ground cinnamon.
  • 1 teaspoon of ground nutmeg.
  • 1 teaspoon of ground cloves.  
  • 1 Cup of almonds or other nuts.
  • 1 Cup of dried fruit (I used muscatels, but apple, raisins, apricot, dates or even goji berries would work. Use whatever fruit and nut or seed combination you like).
  • Half a Cup of coconut.
  • Half a teaspoon of sea salt. 
Method:

Chop the almonds. Place them in a frypan over low heat. Stir for a few minutes until they are lightly browned and you can smell that beautiful smell in the air.

Pop them in a bowl with the other ingredients and mix together. Store in an airtight container in the cupboard. 

When making your individual serves, take half a cup of the mixture and place in a bowl. Top with about three quarters of a cup to one cup of water and place in the microwave for three minutes. You may want to add more or less water depending on how you like your porridge. You may also choose to use a nut milk instead of water, but hey oats and water create a milky result so I never worry about that. 

You can also do this on the stovetop. Mix together in a saucepan over high heat. Reduce the heat and simmer until cooked. 


Below, I served my porridge with some apple, soy yogurt and maple syrup. It was so warm and filling. I can't wait for breakfast tomorrow.


I hope you are having a truly inspiring day! 


Monday, April 8, 2013

Sprouts. How to grow them and how to time manage. x


I have had a very hectic few weeks and despite the rapid nature of it all, I feel like I am not really getting much done for the bigger picture. I have paintings that need to be painted, washing that needs to be washed, friends that need to be seen, drums that need to be played, homework that needs to be done, food that needs to be cooked, and so on and so forth.

At times like this, when I am feeling quite overwhelmed and submerged, I like to break all the things I want to tick off my list into smaller, more manageable tasks. I give myself time frames in which to get things done. Like today, for example, I have the day off work and so I will spend the morning working on this here blog, making food and doing some cooking to get ready for the week ahead. By 12 noon, I will start my painting and work on that until 5 pm. From 5 pm, I will practice my drums and do my cardiac homework. I like to write all of these things down so that if I think of anything else that I need to do it's all there in front of me, instead of swimming in my head causing mini whirlwinds of frustration.

Breaking everything I need to do into a timetable helps me work towards a deadline. As it approaches 12, I will have in the back of my mind that I need to get this done, and I will hurry my arse along to make sure that it happens.

I don't know about you, but if I don't have a deadline, I kind of just meander about, doing little things here and there. I start one thing and then get distracted halfway through by something else that I find needs to be done.

By setting myself goals and a deadline, I can stay focused and get the shit sorted.


And now to tell you about sprouts. 

Sprouts remind me of being a child. At one point, my mum worked in a fruit and veggie shop and I used to go along with her and hang around whilst they set up the shop before I went to school in the mornings. They often had little, interesting items for sale. One of these interesting items was an alfalfa sprouter. A handful of seeds came in a small container and each day I would water them and watch them grow. It was pure magic. I often took them to school with me and we would grow them as a class project.

A friend of mine gave me a fancy seed sprouter for Christmas and it's so much fun to watch these little seeds come to life.

There are many health benefits in regards to sprouting seeds. They are fresh and full of vitamins and minerals but I think the main thing for me in regards to growing sprouts is that they are there in my cupboard, fridge or on my windowsill as I need them, ready to throw in my salad and get in my belly.

One good thing about sprouts is that you can sprout anything that comes in seed form. Make sure that the seeds haven't been sprayed with nasty chemicals though. You want nice, healthy baby plants to make you nice and healthy.

It only takes literally 5 minutes a day and you have a fresh, healthy snack with the added bonus of knowing exactly how it was grown.


What you need:

  • Either one seed sprouter and these can be bought online or from any good health food shop. Follow the instructions.
OR:

  • One clean jar.
  • A tablespoon full of seeds. Alfalfa is a good one to start with.
  • A rubber band.
  • An old stocking.
  • A pair of scissors.
  • A cup of water.
Method:

Place the seeds in the jar. Cut the foot off of the stocking and place over the jar as shown in the photo. 
Secure the stocking in place with the elastic band. 


Pour the water in the jar and let stand in a cupboard overnight.

The next morning, rinse the water out of the jar. The stocking will act as a sieve so you can rinse the water without loosing any of the seeds. You want to leave the seeds moist but not have them drowning. 

Rinse the seeds morning and night over the next few days until they have grown to a substantial size. This may take 4 days to a week.

Once this has happened, give them a good rinse and place them in an airtight container in the fridge. 
They should last about a week in the fridge. 

Add them to whatever you like: salads, a topping for soups and casseroles, into curries. Let your imagination run free! This is a really easy project that the kids will love. x


Tuesday, March 19, 2013

Kung Pao Faux Chicken and a whole lotta love. x


I've been thinking a lot lately about the beautiful ladies I have in my life. We have all been having some very honest conversations about our directions in life and our lack of confidence.

It's amazing just how many strong, independent women I know who, when all walls are down, are actually very shy and insecure, although they exude this beauty and style that is incomparable when in polite society.

It's funny. The people that have come to know me the best over the years are often shocked at just how shy I can be. I come across as fiercely independent, apparently. This is only because I feel the need to get things done and have varied experiences in my life. I bury my insecurities deep down and focus on the task at hand. I refuse to let my shyness win.

Having said that, I can often become very quiet around people that I feel slightly in awe of. I over think my next sentence and don't end up saying much at all.

In all other aspects of my life, I can play the part of nurse, friend and all round good girl, although I never feel 100% correct in my choices. My shyness is incredibly frustrating.

We don't often get a lot of positive feedback in life. I think my shyness relates to not being sure if what I'm doing is good or likeable. I get very shy about my work, but lately I've been loving what I've been creating and that in itself is giving me inner-power.

Last week when I was deejaying, I was saying to my lover that I wasn't sure if people were liking the music I was playing. He said "Haven't you ever heard, no news is good news?" Even though I didn't get any positive or negative feedback during the set, after I was then asked to stay on for another hour and told how much people love having me there. I'm taking this phrase on board and it's helping to make me feel less worried about what kind of impact I am making on this world.

So perhaps, remember that no news is indeed good news, and give someone a compliment. It's a small gesture but it can really make a difference in someones life.

I guess in essence, love what you do. Love yourself and let others know how much you appreciate them. They may just return the favour.

Kung Po Faux Chicken

This recipe is delicious and inspired by all of the asian take out we so often purchase. The faux chicken melted in my mouth and the mushrooms were delectable. I hope you like it, too.

Time: 30 Minutes.
Serves: 4

Ingredients:

  • One Tablespoon of minced ginger.
  • Three cloves of minced garlic.
  • Half a red onion, sliced.
  • One and a half cups of vegetable stock.
  • Quarter of a cup of soy sauce. 
  • Quarter of a cup of rice wine vinegar.
  • Thee cups of quartered mushrooms.
  • One red capsicum, sliced.
  • One cup of sliced bamboo shoots.
  • Half a cup of cashews. (Traditionally, peanuts are used)
  • A light spray of oil. 
  • Chilli to taste.
  • One packet of faux chicken, or perhaps try some tofu chunks.
  • Wedges of lime, to serve
Method:

In a fry pan over medium heat, add the oil, onion, garlic and ginger and fry for a couple of minutes. Add the rest of the ingredients and bring to the boil.

Put the lid on and leave to simmer for about 15 to 20 minutes. It shouldn't take long to cook.

If yours is still a little watery, mix one tablespoon of corn flour with two tablespoons of water to make a smooth paste. Add this to the mix and simmer for a further three to five minutes. I didn't need to do this, but it's a handy hint just in case. 

I served mine with some delicious quinoa and lime. 

I hope you are having an amazing day. x

Make some big jumps...


Saturday, March 16, 2013

Gluten Free Apple and Cannellini Bean Burgers and a little bit of sunshine. x


I often wonder if I ask "why" too much. I remember in high school reading a poem that contained the sentence, "Let be be finale of seem.", meaning in essence, it just is. I recall arguing with such despair with my English teacher that there will always be a reason to ask why. The moment I understood the sentence- it was like a light bulb went off in my head. My teenage mouth fell silent as my mind wandered over the possibility that maybe there is no "why". Sometimes we need to remember to just be. Just let the air breath in and our of our perfect bodies like a giant sigh of relief. We often make ourselves fight such seemingly large battles in order to obtain the answers we so seek.

There aren't always answers for everything and that's ok.


The Emperor of Ice-Cream
by Wallace Stevens.
Call the roller of big cigars,
The muscular one, and bid him whip
In kitchen cups concupiscent curds.
Let the wenches dawdle in such dress
As they are used to wear, and let the boys
Bring flowers in last month's newspapers.
Let be be finale of seem.
The only emperor is the emperor of ice-cream.

Take from the dresser of deal,
Lacking the three glass knobs, that sheet
On which she embroidered fantails once
And spread it so as to cover her face.
If her horny feet protrude, they come
To show how cold she is, and dumb.
Let the lamp affix its beam.
The only emperor is the emperor of ice-cream.

Time: 30 minutes.
Serves: 8 large serves. 

Ingredients:


  • One red onion, chopped.
  • One stick of celery chopped. 
  • One apple chopped. 
  • Two Tablespoons of fresh rosemary.
  • Two Tablespoons of fresh sage.
  • One tablespoon or less of pumpkin seed oil. (Or you can use the oil of your choice. Pumpkin seed gives a particularly nutty flavour.)
  • Three and a half cups of cooked cannellini beans. 
  • Half a cup of cooked quinoa. (Most likely optional, but quinoa is yummy and good for you)
  • Quarter of a cup of pepitas. 
  • One vegan stock cube.
  • One tablespoon of liquid smoke (You could substitute this with smoked paprika).
  • Two cups of rice flour.
  • Salt and pepper to taste. 
  • Oil to fry with.
  • Apple sauce to serve.
Method: 

In a skillet, fry the onion, celery, apple and herbs in a little of the pumpkin seed oil on low heat for about five minutes. 
Add the beans to a food processor along with all of the other ingredients. Blend until well combined. 
Add more flour if needed.
Take the mixture and form into 8 balls.
Fry each one in a fry pan until brown on both sides. I didn't need to use too much oil and fried them over a low heat.
Serve on bread or with a salad with apple sauce. 

My new favourite smoothie or Riot... Don't diet!


I haven't been posting many recipes lately. Essentially, I have been trying to kick some weight that I have put on over the years and have been focusing on salads, green smoothies and clean foods.

About 6 years ago, I quit my physical job of being a school photographer where we were constantly running around lifting heavy objects. I swapped this job for a desk job thinking I would have more stability.

I certainly had more stability. I also had less opportunities to move. At this time in my life, sadly I was in a relationship with someone who's personality clashed a lot with my own and neither of us were very happy at all.

I put on 20 kilos that year.

It was then that I ended the relationship. I changed jobs and became a carer and started uni and was on my way to becoming a nurse. Throughout my life, I had always had employment where I gave back to the community and having a desk job for a corporate company did nothing whatsoever to warm the cockles of my little heart.

Instead of staying in a job which I did not find fulfilling, I changed my career path. On a side note, I have met so many people who are unhappy in life and when probed further, it seems the basis of this unhappiness is their job. Ultimately, we are only here for a short while and we must follow our hearts and dreams. If you spend the majority of your time in a place that makes you unhappy, you will be unhappy.

If you are like me and seem to lack any particular direction, choose one. I do enjoy nursing and it gives me a good outlet for my art. It's a job where I can travel, make enough cash to be comfortable and also one where I can help people. It's not the most glamourous job and it can be quite draining and lead to many an existential crisis, but ultimately, it's for the greater good and I don't feel the soul destroying crush that big business can cause. Also, the hours allow me to have many a side project. I take drum lessons, DJ and paint portraits. Those are my true passions but admittedly, when I worked as a photographer I felt like it wasn't "enough" if you know what I mean. I love helping those who are somewhat neglected by society. Having said that, my skin has also become thick from dealing with those who rudely take more than they should. Oh, the ups and downs of nursing... But that is a different story.

When I changed jobs, I slowly lost 10 kilos. I was getting more exercise and not eating for the sake of eating. I learned more about nutrition and instead of living only on bread, I began to try new nutrient dense foods and quite enjoying them.

Having grown up with a family that focused on dieting but still had a mentality about food as if it was the Great Depression, my idea of food was somewhat skewed. We were often expected to have seconds and thirds at family gatherings whilst the conversation swirled around ideas of "being fat and needing to loose weight".

"You must eat all of the food on your plate. Think of the children starving in Africa."
I'm sure we've all heard this before. This saying has never made sense to me. As a smart arse child, I would offer that we take what was left on my plate and help feed those starving children. Those children will still go hungry regardless of what I eat.

We are not living in the Great Depression anymore, as my grandparents did. Our food is not rationed. In fact, we are privileged in that we can buy food in abundance.  This does not mean that we should gorge ourselves for the sake of not wasting food. We no longer need to think as if we may not have food on our plates tomorrow.

What does it mean to "waste food"? Is gluttony not wasting food? The only real way to not waste food in this day and age is to not buy too much, not cook too much and if you do have left overs, save it for your next meal.

My beloved often teases me for the fact that I often take leftovers home from restaurants. He calls me a "Nana". But do you know what? That is my lunch for the next day. It's not wasted and I don't have to spend any more money or use any more resources in buying more food. I am also loosing weight. Plus, I don't see being called a Nana offensive at all.

Here in Australia we make and receive massive portions of food. None of us want to "waste it". This is why we are having an obesity epidemic. We have been taught to think about food by those who grew up during the Great Depression when sources of food were scarce and little treats were rare and special.
We no longer need to worry about starvation and yet we still have a mentality that if we do not eat everything on our plate, we are wasting it. In what way are we wasting it? If we were to eat more than our bodies wish to receive we become fat and unhealthy. That in itself is a waste of a beautiful, energetic life.  Is it not a waste to eat something that you do not need? It doesn't make any sense to me. Up until recently, I have had rescued pet chickens and rabbits that we fed our leftovers to. We also compost. This is not a waste.

The people who taught us not to waste food are the same people grew up and went through all of the diet phases of the 80's and beyond. Talk about conflict. The idea of the diet actually started in the 1920's when for some reason, society went from thinking that a robust figure was sexy to idealising a more straight up and down figure. This idea of the diet strangely coincides with the beginning of cinema and popular culture.

I have heard every diet hint and tip spewed forth from the mouth of my grandmother who has been a member of weight watchers since before I was born. She has been overweight since I can remember and this weight has an adverse affect on her health. Being that she has this conflicted idea of food consumption, she doesn't seem to understand how food effects the body and has many emotional connections with it.

This can be generalised to many of us that grew up with these ideas being thrown at us.We all seems to think that being thin will in someway make us happy. I suppose given that food is essential for survival and somehow the human condition is all mixed up in survival mode and the emotional state, this is somewhat understandable. Perhaps focusing on eating is a way to not deal with deeper emotions that may be plaguing us. Therefore, over eating or under eating can be seen as an emotional focus when we can't figure out answers to the bigger questions.

Lately, I have been focusing on avoiding mindless snacking. I have not been drinking alcohol. I have been buying only what I need regardless of what is on special and I have been eating until I am full and no more. I have been recognising that if I just need something to do, eating is not the answer. Filling my life with things that I have always wanted to do and often put off, like study and make art.

Eating is not the answer. Unless of course, your body tells you it's hungry.

Having said that, I have lost 4 kilos in the last week without really doing much. My nails have gotten stronger, my existential crisis is resolving and I have more energy.

I feel good.

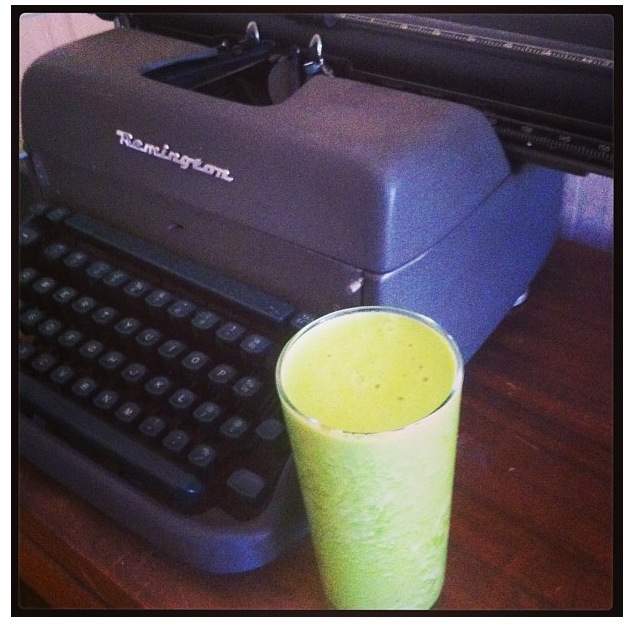
Above is my recipe for this weeks favourite smoothie which I have been eating for breakfast or lunch. x


Tuesday, February 19, 2013

Green Monster Smoothies :)


Despite the recent death of my Thermomix, I have been concentrating on drinking green smoothies  after my little health scare the day after Australia Day. I am happy and healthy but collapsing after feeling my heart kick off was certainly a wake up call.
Since then, I have quit drinking alcohol and increasing my levels of basic exercise. In my last post, I told you that I wasn't really sure of how to appease my boredom when it comes to exercise. I realised that this was in part down to time constraints. I like to organise my exercise around work.
I was riding my bike to and from work which increased my energy levels and gave me some valuable time with my music collection. The downfall, however, was that doing this took away from my reading time, as I like to read on the bus. Reading on the bus helps me to relax.
Obviously, I like to multitask.
I have since come up with a new plan. I now walk one way and catch the bus the other way. So many birds with one stone. Amazing. I feel great.
I have also started drinking an array of green smoothies. My skin is getting clearer. My memory is better and my nails are stronger. I feel good.
My friends are often asking what I put in my green smoothies so I thought I would share some of my favourite recipes with you. I definitely feel that green smoothies taste better when it comes from a high powered blender, as the fibre breaks down. It still tastes good from a regular blender, but is often a bit fibrous. I make one batch and drink it over two days, usually for breakfast or as a snack.
One thing to note. I actually hate spinach. I am learning to like it through these smoothies.
Adding ingredients like citrus and ginger help to mask the horrible taste. Citrus also adds valuable vitamin C which needs to be replaced in the body daily. Vitamin C also aids the absorption of iron, so your body will increase it's intake of iron from the spinach just by adding a simple lemon or grapefruit.
Here are some of my favourite recipes. Have a play with other ingredients and find a recipe all your own that you love.
A thumb of ginger just means a small amount, about two cm squared. Please don't write me saying you put in a piece the size of your thumb and you don't know why it tastes horrible. I'm sure most  of you get it. As always, these are basic suggestions. I'm sure you are clever and can use these recipes as a guide to go along with your own tastebuds. (Ooh, venting! I do get some very strange comments on here from people that don't seem to trust their own instincts. Everyone's tastebuds are different. Go with your gut.  ;)

Time: Less than 5 minutes.
Serves: 1-2 

Ingredients:

The basic Green Machine:

  • One large handful of baby spinach. 
  • One apple.
  • One stick of celery.
  • One lemon.
  • Half a cucumber.
  • One thumb of ginger.
Tropical Green:
  • One large handful of baby spinach.
  • One mango.
  • One lemon. 
  • One thumb of ginger. 
Tart and Tasty:
  • One large handful of baby spinach.
  • One grapefruit.
  • One thumb of ginger. 
  • Half a cucumber.
I can't think of a good name for this one but it's pineapple and I love pineapple:
  • One large handful of baby spinach.
  • Quarter of a pineapple, skinned.
  • One cup of coconut water instead of regular water.
  • Ginger. 

Method:
If using a regular blender, chop up these ingredients and place them in the blender. Add one cup of water and maybe some ice and blend for about 3 minutes until it's all liquified. Obviously, blending time depends on how powerful your blender is. My regular blender is just a cheap one and this is about how long it takes me. I do need to push the veggies around to assist the blender chop it all up. Watch your fingers!

If using a high powered blender, add all of the ingredients and blend on high for one minute. Add one cup of water  and maybe some ice and blend for a further minute.

Keep in the fridge.

Big Love! x

Thursday, January 31, 2013

Polenta based Pizza- Great for those clean, GF moments.


After a little cardiac scare and post the hectic Christmas and New Year season, I've decided to really step it up in regards to my health. I've always eaten quite well, but I often over indulge in the good stuff and drink a bit (or more) of alcohol here and there. I also usually go out for dinner at least once or twice a week and despite that the food I choose is vegan, I am under no pretences that it is indeed healthy.
I must admit I also haven't exercised in a while, unless you call dancing until my legs hurt in the wee hours of the morning exercise. It's hard to find the time when I'm trying to balance work, my art and my social life (read that as letting my friends and family know that I love them, not just being up for a party).
I know. I know. Exercise is something I need to make time for, but honestly... I sometimes find it boring. No matter how much I love riding to work, I've been riding the same paths to work for a few years. No matter how much I love bikram yoga, it's the same poses over and over. What do you do to keep yourself entertained?
I'm trying to find a gym that has classes close to my working hours and is near my place of work. I am also trying to start a little home gym. We'll see what happens. I think my aim will just be to move for an hour a day at this stage. One thing I do love is dancing around the house. Surely that works?
I am also cleaning up my food intake. I've stopped drinking alcohol. I've increased my intake of greens and am steering away from any processed foods whatsoever.
I found the idea for this recipe in a little book called "Clean Start" by Terry Walters. It seems to have a more macrobiotic outlook which I can really appreciate. Everything in it is cooked in someway, even the salad I ate yesterday. I appreciate raw foods but on a day like today where you can forget that it's summer, I like something warm in my belly. The book is great in that it has different seasonal recipes containing all the food that the season brings forth.
This pizza is a great idea. I took the idea for the base and just added my own toppings. I don't know about you, but I always just use recipes as a guide and substitute with whatever I have in the cupboard and so for this reason, I will just tell you how I made the base, what I added as a topping and you can change it up however you see fit... And it's gluten free. I've made a few changes to the original recipe for the polenta to make it more tasty and silky. Hope you like it.

Polenta Pizza

Time: About an hour.
Serves: About 8.

Pizza crust:

  • 4 Cups of veggie stock.
  • 2 Tablespoons of olive oil.
  • 1 teaspoon dried basil.
  • 1 teaspoon oregano.
  • 1 teaspoon of minced garlic.
  • 1 and a quarter cups of polenta.
  • Salt and pepper to taste.
Method:

Place the veggie stock in a saucepan and bring to the boil. Add the oil and herbs and stir. Whilst stirring, add in the polenta. Keep stirring until it thickens and becomes smooth. 
Take a large oven tray and line it with baking paper. Spread out the polenta until it's about as thick as a pizza base. Like this: 

Set aside or place in the fridge until it's firm. Once it's firm, add your usual toppings and place in the oven and bake at 180C or 350F for about 40 minutes or until the toppings are cooked. 
I added tomato paste, portabello mushrooms, red onion, capers, red capsicum and a cheesey cashew and polenta topping with baby spinach and fresh basil. I also added a balsamic glaze over the top. You can add whatever makes you happy. :)

Serve warm and take the leftovers for lunch. x


Friday, December 28, 2012

Raw Banana Ice Cream. A Real Revelation.


I love ice-cream. There are some great brands out there that make delicious, cruelty free ice-cream for our taste buds to devour but there is something amazing in taking it right back to basics and making it yourself. Seriously, this recipe could not be easier, cheaper or healthier for you. I always end up in childlike awe and wonder when I make a banana ice-cream. It's just like the real thing. I can't fault it. You can add so many different flavours to it to make the ice-cream of your dreams. Have a play.

Time: Freeze overnight and then five minutes prep.
Serves: 6

Ingredients:

  • Six bananas.
  • Whatever you wish to flavour it with, like half a teaspoon of vanilla, or one tablespoon of lemon juice or one tablespoon of cacao nibs or one tablespoon of peanut butter. I used cashews in the photo.

Method: 

Chop the bananas and place them on a tray. Put them in the freezer overnight.

The next day, place them in your blender/ food processor with the other ingredients for a few minutes on high until it looks like ice-cream. You can place it in a container and keep it in the freezer.
The banana ice cream keeps for quite a while.
I recommend letting the mixture sit on the bench for a few minutes before serving if you are taking it directly from the freezer as it can be rock solid.

Devour, completely guilt free. 

Thursday, December 27, 2012

A little late, but Easy, Vegan Fruitcake.


You are  a fruitcake.

Just joking! How was your Christmas? Good, I hope.
Me? I finished nightshift at the hospital at 7:30 am had a nap and then awoke to some amazing presents (not that that's what it's all about) from my favourite person in the world. We then scuttled off to Gordy's mum's house for lunch and then my mum's house for dinner. They both went to so much trouble to make me a wonderful meal. So beautiful.
Last week, we went to a Christmas lunch put on by a friend. As I had been working nightshift, I hadn't prepared any food to bring with me. The savoury food was easy when it came to finding something vegan. I had mushrooms and a bean salad. When it came to dessert, I thought I would only be eating the fruit, until my lovely friend told me of the ingredients in the fruitcake that she had made. The cake was tangy and delicious and sounded simple to make.
I went home and googled  the recipe. I looked at quite a few different ones and read all the comments to come up with a recipe that took all of their trials and tribulations into account. It was so delicious. I fed it to my family for dessert on Christmas night and not one person made a comment about it being vegan, as they usually do. They all quite enjoyed their cake. This recipe is probably a little late in timing but it's a good one to remember, none the less. It makes a relatively healthy snack, even if you bake one and cut it up into pieces to freeze for work and school lunches.

Time: Overnight to soak, ten minutes to prepare, 1.5 to 2 hours to cook.
Serves: Many. About 16. 

Ingredients:

  • One kilo (2. 2pounds) of dried fruit.
  •  2 Cups of orange juice. I've seen that some people find this too tangy. If you're not a fan of the tang, maybe try half OJ, half water or half apple juice.
  • 2 Cups of self raising flour.
  • Half a teaspoon of cinnamon.
  • Half a teaspoon of cloves.
  • Half a teaspoon of nutmeg.
  • One Tablespoon of rum (pirate talk, optional).

Method:

Soak the dried fruit in a bowl with the orange juice overnight.
The next day, add the other ingredients to the bowl and give it all a good stir.
Now, you can either make one cake or two. I made two medium sized loaves and took one to work and one to the family dinner. Make sure whatever pan you put them in is either non-stick, well greased or lined with baking paper so the cake doesn't stick.
Place in the oven at 160C/ 320F for an hour. At this time, check that the cake is cooked  by sticking a skewer in the middle of the cake. If it comes out clean, it's ready. If not, place back in the oven and cook for a further 30 mins. Repeat the skewer action. It should be ready if you have made the loaves, but one whole cake may take another 30 minutes.
All ovens are created different. You know your oven better than I do so have a play and see what works for you. The cakes shouldn't need longer than 2 hours.

Serve with custard and enjoy any time of the year. x

Tuesday, December 11, 2012

Rice Balls in Rich Tomato Sauce.


I have had a fantastic day. I have spent the day relaxing with one of my favourite activities- cooking. It's been a massive week. I've been working quite a lot, at both my day job and in my creative pursuits- deejaying and curating. It's lovely just to have a day to potter. Admittedly, I feel a little bit scattered today. I'm finding it very hard to concentrate on just the one thing. I think this is because my job insists that I put my mind in many different places at the one time. I find it hard just to stop. So I've made a whole bunch of food and am working on some projects, one of which I'll let you know about soon

On Sunday, we went to the Torrens Island markets. Tomatoes are currently $2 a box. Bargain! I've just made a large pot of Italian style tomato sauce. It's rich, thick and delicious with surprisingly only a few ingredients.
For dinner we had rice balls that I filled with mushroom pate, but you can fill them with whatever you like. It seems like it's all a little complicated, but when it gets down to it, you don't have to spend much time actually cooking. Most of the time is spent watching the ingredients cook and letting the beautiful aromas fill your gorgeous house.

The Sauce
Time: 10 minutes prep for the sauce, 45 minutes cooking.
Makes: About a litre and a half (6 cups).

Ingredients:

  • One Tablespoon of oil.
  • One onion, chopped.
  • About 12 tomatoes, chopped.
  • One teaspoon of salt.
  • Half a teaspoon of sugar or stevia. 
  • 6 leaves of basil.
  • 2 Tablespoons of tomato paste.
  • One bay leaf.
  • One clove of garlic, minced. 
Method:

Place the oil in a saucepan and heat over medium to high heat. Add the onions and garlic and fry for a few minutes. Add the other ingredients and bring to the boil. Reduce heat and simmer with the lid on for about 45 minutes. Let cool and remove the bay leaf. Pour the ingredients into a blender and blend until smooth. I do this to avoid having to remove the tomato skin beforehand. 

The Rice Balls
Time: 15 minutes to cook the rice. Five minutes to roll.
Makes: 6-8.

Ingredients:

  • One cup of brown rice.
  • Two cups of water.
  • One teaspoon of vegetable seasoning.
  • Filling of your choice. I used mushroom pate, but you could use a nut cheese or well... anything. 
  • Half a cup of flour. 
Method:

You know how to cook rice, right? Do it. Place the rice in a saucepan with the water and bring to the boil. Reduce the heat and simmer for about 15-20 minutes. Drain. Allow to cool. 
Place the rice in a bowl and stir in the vegetable seasoning and flour. Take a small scoop of rice and place it in the palm of your hand to make a semi-circle. Press your thumb into the middle. Add about a teaspoon of the filling of your choice. Place another semi-circle of rice on the other side and shape into a ball. Repeat until there is no rice left. 


The Rice Balls in Rich Tomato Sauce

Preheat the oven to 200C or 400F. Take a casserole dish and half fill with tomato sauce. Any left over tomato sauce can be frozen until your next pasta dish. Gently place the balls in the sauce and drizzle with a little olive oil. Place in the oven and cook for about 25-30 minutes. The outside will be crispy when they are ready. 


Enjoy with a gorgeous side salad. 

Monday, December 3, 2012

Marinated Mushrooms for the win!


I'm always on the lookout for delicious salad ideas, especially now that we are hitting the hot South Aussie Summer. I wanted something a little different and a very delicious. I have had sushi with these mushrooms in their guts and I must say I love that sushi more than I love the tempura pumpkin sushi. That is saying something. I've had to stop myself from eating these out of the container.

So, what have you been up to? I feel like every time I answer that question the only answer I have is "Oh, you know. Working." I've been up to so much more than that though. I've been organising exhibitions, deejaying and having super happy fun times with my mates. We have a group exhibition opening tomorrow at Suzie Wong's Room at six if you're in town.

Makes: About a cup of sliced 'shrooms.
Time: Five minutes prep and at least half an hour to marinate.

Ingredients:

  • 8 Button Mushrooms, sliced.
  • 2 Tablespoons of tamari or soy sauce or bragg's.
  • The juice of 1 lemon.
  • 2 cloves of garlic, minced.

Method:

Slice the mushrooms. Place the other ingredients in a container and mix together. Add the mushrooms and place in the fridge for at least an hour to marinate.

Use these babies on top of delicious salads, in sandwiches, wraps or sushi.

Tuesday, November 20, 2012

Delicious Gado Gado... x


Adelaide is really coming along in terms of pop-up food stalls and interesting and creative cafes. There seems to be a new one each week. This week, I went to The House of Donkey on Sturt Street in the City. I really like that area of town. It's more relaxed with old cottage houses and interesting little hidden gems.
The House of Donkey is super cute. The theme is obviously the donkey, with a large painting on the wall and lots of small ceramic donkeys adorning the windowsill filled with gorgeous little succulents. 

House of Donkey serves simple and delicious vegetarian and vegan food. The prices are rather reasonable. In the middle room of this house turned cafe is a floristry set up. Out back are reclaimed pallets that have been made into vertical plant boxes. They also have fresh vegetables growing in the garden. So cute.

For lunch, I had the Gado Gado, the chocolate raspberry pie and an iced green tea with mint, cucumber and fresh lemon. I was delicious. I was highly inspired to make my own gado gado.
Apparently, some of the veggies should be traditionally blanched but as I'm not too into being fussy, I'm just going to chop my clean, fresh veggies and add the delicious satay sauce. Also, carrots are not a traditional ingredient. This is evolution, baby.

Time: 20 Minutes.
Serves: About 4. 

Ingredients:
  • Three potatoes, peeled, chopped into large but bite sized pieces. Boil in some water until just tender. Not too tender. You want them to stay in one piece. Drain the water and let cool.
  • A quarter of a red cabbage, sliced.
  • About two cups of bean sprouts.
  • One carrot, grated. Actually, I spiralled mine into ribbons. Do that if you can, or just grate it.
  • About 10 green beans, halved.
  • One spring onion, chopped.
  • A small handful of coriander, torn into little bits.
  • A small handful of mint, torn. If you tear it, it stops the edges going brown like they do when you cut it with a knife. 
  • Four Tablespoons of natural peanut butter.
  • The juice of one lime.
  • A few shakes of pepper.
  • Three Tablespoons of water. 
Method:

Place the potatoes, cabbage, bean sprouts, carrot, green beans, spring onion, coriander and mint into a bowl and gently toss together with your hands. 
In a separate bowl, Place the peanut butter, lime juice, pepper and water and mix together with a fork. Depending on how you like your dressing, you can add more water for a thinner dressing or less for a thicker dressing. I sometimes like mine thicker so I can use it as more of a dip.

I'm actually having this for lunch tomorrow. Can't wait. It's super hot here, at the moment but the night sky is full of thunder. So beautiful.


Tuesday, October 23, 2012

A short and sweet recipe for Mustard Pickles.


It is  a glorious day here in Adelaide. Today, I plan on doing some painting and getting my art on before I host a drawing group tonight at Suzie Wong's Room.
Yesterday, I had a mad cooking day in case you didn't see all of my Facebook status updates. Myself and my lover had moseyed on over to the Torrens Island markets where we bought a ridiculous amount of food including a box of mushrooms, 14 punnets of strawberries and so much of a whole bunch of stuff for a lowly $30.
Yesterday I made mushroom stroganoff, mushroom pate, mushroom soup, mixed vegetable curry, a saag paneer for my lover, strawberry and vanilla bean jam, strawberry gin, apple chips, dehydrated strawberries and what will hopefully be rum and raisin chocolate fudge. I'm still working on the fudge recipe. I think I added too much milk initially. It's a work in progress at this stage but I swear I will get you the recipe as soon as it works.
I also made these Mustard Pickles. I love them because they remind me of picnics on sunny days with cute little sandwiches and bike rides along the river.
They are super easy to make.

Time: 15 Minutes prep. A night for the cucumbers to get all soft. A day to sit and get all pickle like.
Makes: 3.5 standard pasta sauce type jars full. 

Ingredients:

  • 5 Cucumbers, sliced.
  • 2 Red onions, halved and then sliced.
  • 1 Tbs Salt.
  • 1 Cup of raw caster sugar. 
  • 2 and a half cups of apple cider vinegar.
  • 1 Tbs of mustard seeds.
  • 1 teaspoon of turmeric. 
  • 1 teaspoon ground coriander.
Method:

Place the cucumbers, onion and salt into a container with a lid and leave in the fridge overnight. The next day, wash the salt off in a colander and then dry with paper towel.

In a saucepan, add the vinegar, sugar and spices over medium heat. Heat through until the sugar dissolves. This should take about 5 minutes. Add the cucumber and wait for little bubbles to start appearing in the liquid. Take off the heat and place in sterilised jars. Place the lid on and set aside for one day for all the ingredients to get to know each other. Keep in the fridge once opened. 

Serve on sandwiches, toast, in a salad or with your favourite nut cheese.  

Monday, October 8, 2012

Vanilla Cupcakes with Marmalade and Almond Topping.


Last week I was on night shift at work and I made these delightful little cakes to share with my coworkers. They were light and fluffy and went so quickly that I made some more the next night for all those that missed out on the first batch.

Work was fun. I worked with some lovely people and during a quiet moment we went ghost hunting around the spooky corridors of the hospital. We freaked ourselves out. It was hilarious.

Time: Ten minutes prep and 30 minutes to cook.
Serves: 18.

Ingredients:

  • 1.25 cups of vegan butter, like nuttelex.
  • 1.25 cups of raw caster sugar.
  • 1.25 cups of self-raising flour.
  • 2 level teaspoons of baking powder.
  • 4 teaspoons of egg replacer. I used No Egg. Follow the instructions on the box to make it. You may have to mix it with 4 Tablespoons of water.
  • 1 tsp of vanilla.
  • Half a cup of chopped almonds.
  • Half a cup of marmalade. 
Method:

Pre-heat the oven to 175C/ 350F. 

Place all of the ingredients except the marmalade and almonds in a bowl and blend with a  hand blender.

Place 18 patty pans in a muffin tray. Scoop a heaped tablespoon into each one. 

Place the trays in the oven and cook for half an hour or until golden brown. You should be able to stick a skewer in them and have it come out clean. Place the cupcakes on a wire cooling rack. 

Place the marmalade and almonds in a saucepan and bring to the boil. 
Take off the heat and place a little on each cake. Allow to cool. 


Gobble these babies up.